I was a bit apprehensive about today's tasks. I've never done "semi-wrap" seatstay caps before. And the rear triangle is generally very finicky—once it's set it's set. But it all went as well as could be expected.
Step one was shaping the caps. I did this by dry-fitting everything in the rear triangle fixture and using the brass hammer with a smaller-headed drift. It was incredibly easy, and required no heat.
Then it was time to braze in the seatstays. Using a Doug Fattic contraption to hold the stays in place at the dropout end (an elastic band looped around the dropout and a brass rod sticking out of the SS venthole), I used my regular 56% silver to make my fillets. I remember doing this with the bike on the surface plate in Doug's class, so I did it that way. The horizontal position is pretty ideal.
This step seemed to go very well—but you never can tell until the flux is off.
After I'd done both sides, I moved on to the seatstay/dropout joint—which is both less intimidating and less photogenic.
(Speaking of photogenic, though, note the perfectly white background. This is the projector screen I brought in to mitigate the effects of backlighting. We work with a workbench directly in front of a window. Out the window is very bright white concrete, which can make it very hard to see what you're doing. So I thought placing a white screen behind me while brazing might help. And it did—at least a bit.)
When I got home I soaked off the flux, and was pretty happy with what I saw. My silver fillet is absolutely perfect on the drive side: I kept all the filler on the lug (none crept on to the tube), and the fillet is gap-free:
On the non-drive side it's a bit clumpier but still really good.
I even managed to keep the points more or less symmetrical. (And I like that fairly slight amount of wrap).
There are a lot of ways to screw up the seatstay caps, and there aren't many ways of getting in there and fixing it if you do. I'm really happy I managed to do this cleanly. Now the bike is pretty much done! Just a seat stay bridge (I think I'll skip the CS bridge) and I think a set of water bottle bosses. Then some lug filing and cleanup on the dropouts.
Tuesday, August 31, 2010
Saturday, August 28, 2010
Monty's Getting Close
I've been back in the shop every day for the last three days, and have gotten Monty very close to completion. Yesterday I did some finish work on the dropouts—for example, put these little points on them:
I also brazed the chainstays into the bottom bracket (a bit clumsily—my two months off showed themselves). The first thing I had to do today was clean up the inside of the bottom bracket, grinding down what was left of the brazed-in chainstays and then re-tapping the threads. With the BB opened back up, I was able to put the frame on the surface plate and make sure the dropouts were centred. Then I used a new tool Olivier made that uses a true wheel as a reference for determining that both dropouts are also at the same height. (Imagine a wheel in a bike with centred dropouts at different heights... viewed from the back, the wheel would jut off to one side, like a slash: /).
Once I was sure the wheel was going to track properly in the dropouts, I started to work on the seatstays. I capped them quite a while ago, so I just needed to cut them to length; nonetheless a tricky and important job. Here is the driveside stay dry-fit in place:
And here's the other end of the same stay:
Those dropouts really are elephantine. Lots of filing to be done once the seatstays are brazed in.
I have also decided on a new colour scheme for Monty. He will be light blue, cream, and red—the colours of the Canadian cycling team in its glory days. Here's Jocelyn Lovell on a track tandem, showing off the colours:
These colours seem fairly closely related to those of the Royal Canadian Air Force, seen here:
Some similarities to the Toronto Blue Jays logo during the period they won their World Series titles...
And, quite a bit like the first Mariposa—which was also a fixed gear.
Monty will be a Canadian nationalist, much like the forthcoming Greg Curnoe bike.
One more day in the shop and Monty will be ready to head to Velocolour for paint...
Update: Here is a proposed colour scheme for Monty, who I think I will rename "Jocelyn Lovell bike." The frame will be the light blue colour all over, except for a masked cream head tube, and red logos and decals. The fork crown will be blue with the "chevron" painted red, and the fork blades and dropouts will be white. I'm not 100% sure I'll have the Reynolds 531 decals applied (to the frame and fork), but I think I will.
Wednesday, August 25, 2010
Back in the Shop
Two years ago, I spent the month of July learning how to build bicycles in Niles, Michigan. This year, I spent all of July and most of August teaching 40 University of Toronto students how to write effectively. Between that and various other academic responsibilities, I only had time to briefly drop in to the shop one—to check out Olivier's now-complete first frame.
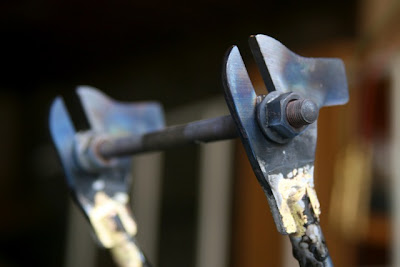
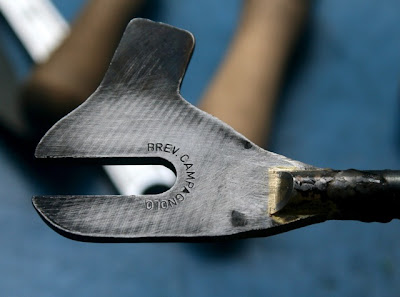
Today, finally, I took the afternoon and did some work on the long-neglected Monty, my fixed gear bike. I brazed my cool Campagnolo track fork ends to my Reynolds 531 chainstays—and it was extremely fun.
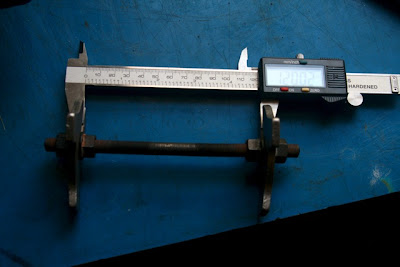
I'd never slotted chainstays, but I was left with no choice, since the Campagnolo track ends are so shockingly massive. I slotted 15mm, though I might have gone longer. I used the usual system of sticking the dropouts on an axle and making sure they're square with one another. Here they are, set to almost exactly 120mm:
It felt a bit weird brazing after almost two months off—but it came off okay. Here's everything post-brazing:
Given their hugeness, lots of filing is required for these track ends. I did a bit today, but more remains to be done...
I should have lots of time for frame-building over the fall and winter. For now, I'll concentrate on finishing this bike off, and then move on to completing the Greg Curnoe bike.
Subscribe to:
Comments (Atom)


